Posts

Showing posts from June, 2018

Week 6: June 28, 2018

Image
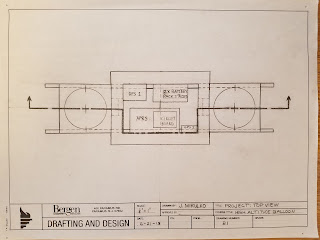
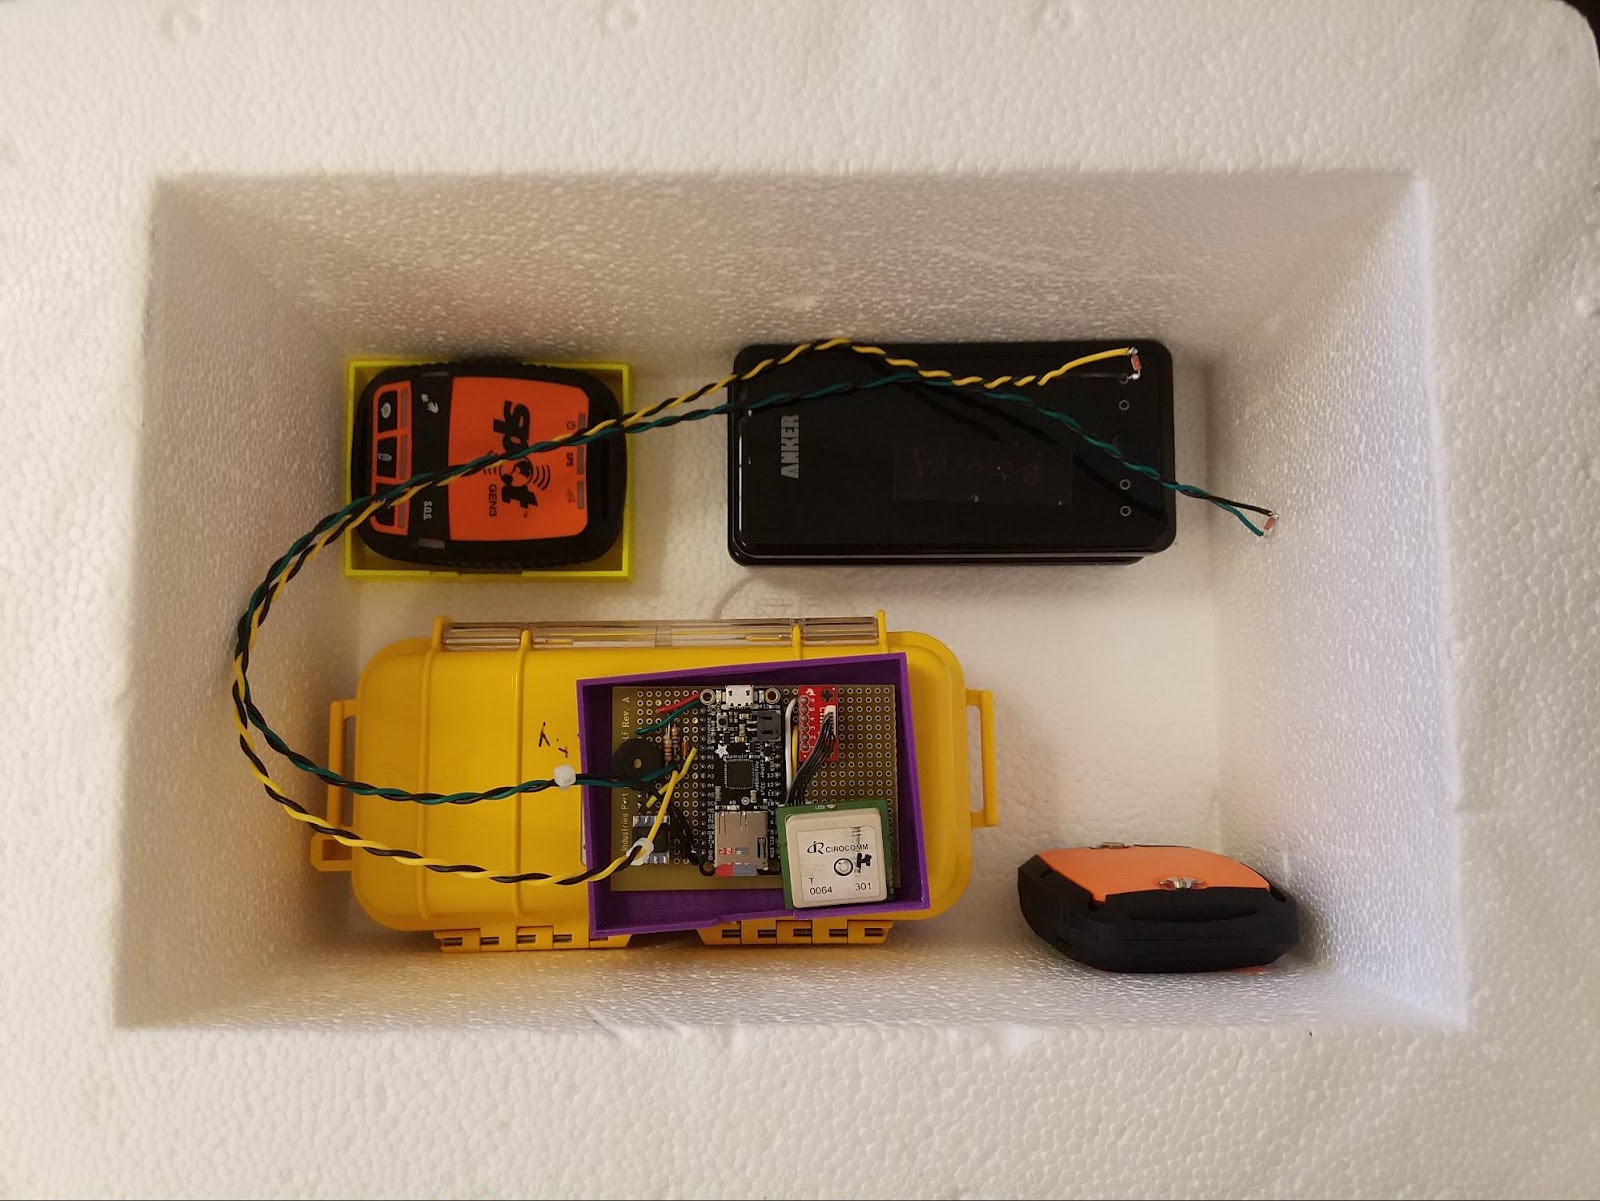
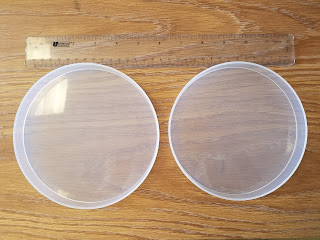
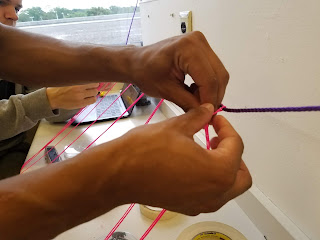
The front view drawing was corrected because there were hidden lines for the perti dish when it is suppose to be solid lines since it is sectioning.  Image 1. Top View Image 2. Front View Corrected The drawings still need to be dimensioned after it has been approved. However, Professor Griffo stated that he wants the poles with the petri dish assembly to be on the longer side of the box instead of the shorter side. Also, the petri dish assembly needs to be completely outside of the box instead of it being partially inside the box as it is drawn. Below are pictures of equipment that will be included in the final group report paper.  Image 3. Box View 1  Image 4. Box View 2  Image 5. Box View 3  Image 6. Box View 4  Image 7. Ruler  Image 8. Net  Image 9. Spot GPS  Image 10. APRS  Image 11. AA and AAA Batteries  Image 12. Petri Dish View 1  Image 13. Petri Dish View 2  Image 14. Covers

Week 6 June 27

Image
We erased the testing footage of the cameras to free up memory space for the launch. That said, we are trying to figure out whether to place the circuit board on top of the APRS or the battery pack. Additionally, Jennifer has finished sketching the top and front views of the payload. We just need the to be approved. We are still trying to receive permission to 3-D print the camera casings and other components.

Week 6: June 26, 2018

Image
On June 21, 25, and 26 of 2018, Jennifer worked on the mechanical drawings for the project. Using her drafting kit and the drafting table in the college's library, Jennifer created a top and front view of the box with 2 petri dish assemblies, 2 battery packs, 2 camera (the other 2 camera will be installed into the lid of the box), 2 SPOT GPS, and the APRS. The lid of the box is not drawn yet. The front view drawing is not complete; but, the top view drawing is complete. However, both top and front views are not dimensioned. The scale is 1/4" =1". The drawings will be dimensioned after the positions of the equipment inside the box is approved by Professor Griffo. The dimensions for the following drawings are: Box Length: 14.75 inches Height: 7 inches Width: 11 inches Inner Width: 7.5 inches Deep: 5.5 inches Thickness: 1.75 inches Petri Dish Diameter (from outer edge to outer edge): 6.3 inches (approximately) Height: 0.75 inches Petri

Week 5: June 20 2018

Image
We are testing the equipment for the high altitude balloon's payload. The two Spot's, APRS, and four cameras will be left powered in the box without the lid for five hours. We will later retrieve the equipment to check if everything is still functional.  We went over Zack's "Motor Shopping List" for a servo motor to use in the payload. So far, we agreed on the FS90R.  We checked the GPS devices on the computer and it stopped receiving data about forty-five minutes to an hour after deployment, so we needed to move the box around to recalibrate them.

Week 5: June 19, 2018

Petri dish mechanism bottom piece: 16mm Petri dish mechanism top piece: 15mm Total petri dish mechanism height: 31mm = 1.22047 inches Screw diameter: 2.66mm        So, at least 2.8mm to make the screw holes in petri dish mechanism. We need a screw length of 1.5 inches We need to gather the materials of screws, nuts, and bolts to edit the mechanism on the Fusion 360 program, which will be 3D printed later.

Week 5: June 18, 2018

Image
Week 4: June 14, 2018: We started to write the research report/summary paper for the high altitude balloon project. We are also assembling a larger net for the balloon's payload.   Week 5: June 18, 2018: Six petri dishes have arrived. We will use the lid of the petri dish because it has a bigger diameter. Image 1 The object to the left in Image 1 is the lid of the petri dish. It is bigger than the piece seen to the right. We will use the lid of the petri dish (left) as our base.  The new lid will be a 3D printed plate.  The dimensions of the petri dish are: Top diameter from outer edge to outer edge: 16.2 cm Bottom diameter from outer edge to outer edge: 16.0 cm Height: 1.92 cm [Note: the 3rd significant figure (2) is estimated] Thickness of edge: 0.2 cm Thickness of bottom: 0.2145 cm Inner diameter from inner edge to inner edge: 15.7 cm The dimensions have been edited on the Fusion 360 program for the petri dish mechanism. The dimensions and overall mechani

Week 4: June 13, 2018

Image
A YouTube video aided us in the creation of the net. The net will cover the box as its purpose is to help contain the equipment during and after flight when it returns to the Earth's surface. We used eight starting points; however, we will need to add four more for a total of twelve. The colors chosen are purple and neon pick. Purple is Bergen Community College's color and the neon pick will be very visible when retrieving the equipment in a environment such as a forest.    Image 1. Knitting Image 2. Net While part of the team knit, the other members tested the Spot GPS in cloudy conditions to see it the data will still be received. Additionally, the Spot GPS has been placed inside the box.  Image 3. Weather Condition is Cloudy  Image 4. Spot GPS Placed Inside Box  Image 5. Testing Image 6. Testing The testing of the Spot GPS in cloudy conditions and inside the box succeeded. SUCCESS However, the APRS has not been turned on. FA